Monday, October 31, 2011

Families:Revit::Lines:ACAD

The intention behind Revit, or BIM, or any 3D modeling program is that you building the building in 3D in the computer before you construct anything in the field. The benefits behind this are numerous and include (but aren't limited to): performing clash detection, seeing the true sizes, clearances and other spatial requirements of objects, being able to cut instantaneous sections and see the correlation between Architecture, Structure, and MEP.

Revit (BIM) is not ACAD and requires an entirely new way to think. The traditional ACAD thought process does not work with Revit and is not the correct way to go about putting things together in a model. (I believe the first commandment of working in Revit goes somewhere along the lines of: "BIM is not CAD". The second being "Thou shall not draw lines in the model".)

In my experience of writing curriculum and teaching BIM, implementing it in offices, writing office standards and participating in beta testing of new products, one of the biggest issues with people new to the world of BIM having drafted in CAD for the last 20 years is understanding how it works and what the appropriate thought process is.

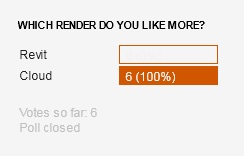
Here is a situation recently run across. On an RCP, it appears as if an access panel is meant to be placed into the ceiling adjacent to a mechanical device. This 'access' panel was drawn using all lines. This goes against the 2nd commandment of BIM. The reasons this is the inappropriate way to do things is several.
  1. It's not an object. Revit doesn't know what it is, how it interacts with the ceiling.
  2. As a series of individual lines, it cannot be moved easily.
  3. If you wanted to change the size of all hatches, you would need to go to each one an individually change its size.
  4. Since it's not an object, Revit (with the help of Navisworks or QTO) cannot tell you how many exist in the project
  5. It will not show up in section cuts of the ceiling, you will need to draw it into any section cuts
  6. Lines can behave unpredictably when moved.
  7. It cannot be given a keynote as an object, linked to a spec section, or be identified by a manufacturer or model number in the model
  8. It probably took longer to draw each of those lines than it would have been to find an appropriate access panel family, or to create one
  9. Ninth: If this was a family, each of the previous 5 issues would not be a problem.

Friday, October 28, 2011

Equipment Everywhere!

When placing objects in a model such as furniture, specialty items, etc. you need to pay attention to the elevation at which you are inserting them. Is it face based? Which face are you attaching it to? Which level are you attaching it to? What is the offset? Revit is a 3D program, every element isn't just located in 2D space like in ACAD, it must be located in 3D space, so the 'Z-axis' is real and does exist.


If you place an object and it doesn't show up in your view (like floor plan, elevation, or RCP) and you think it should, you should first be checking the workplane and any offsets (found in the properties of the selected object). If it doesn't show up and you think you should be seeing it, check those options before putting it. If you are clicking, the object is being placed somewhere!

Here is a situation recently run across. If you are having trouble identifying the pieces of the picture, these are shelving units, except they are located above the ceiling plane. When placed, the offsets of these objects weren't paid close attention to so they ended up above the ceiling plane, thus not showing up in any plans, rcp's or elevations. The objects were placed a second time in the correct location (sometimes) but the original objects were left in place. Other elevation views there is much confusion about where the objects are because the modeler 'knows they put them in'.

This results in the double counting of objects, unless they intersect any other elements (which usually they don't) they won't show up in any clash reports or anything else, the only way you would know is if you looked in 3D above the ceiling.

The solution we should all take away from this experience is to pay attention when placing objects to their offset parameters, and if it doesn't show up like you think it should, then something probably went wrong. Do yourself a favor, 'ctrl-z' and figure it out!

Wednesday, October 26, 2011

One Piece Ceilings, a No-No

You may be tempted when drawing ceilings, particularly when defining the edges manually, to do more than one room or ceiling at a time. (see images below) If you notice when using the 'auto' tool, that it only does one room at a time. If you select more than one room at a time, or draw the boundary for more than one room at a time, you are probably doing it out of a mere desire to save time, but in reality you are causing yourself more headaches and time down the road.


When placing ceiling tags to tell the type of ceiling as well as it's height, it will automatically snap (if using no-leader) to the center of the ceiling. If you have drawn more than one space's worth of ceiling, then when trying to place the tag, you will need to exit and re-enter the annotation command, and when you click it will place the tag in the exact same spot as the first. Unless you know it is doing this, you will have no idea where your tag is and probably try to click multiple times. If you do several ceilings, or soffits in a line down a long building, this can make the annotation process very tedious and time consuming, because instead of showing up at the center of that particular object, you are instead showing up at the center of the entire assembly and you will be required to move each tag to its appropriate place.

If you do each space separately, tagging becomes much easier as you can keep the command active and simply click on each ceiling. If you want to adjust one ceiling, you are able to without affecting a bunch of other ceilings. In the world of integrated construction, quantity take off's (QTO's) the sharing of the model and LOD modeling each ceiling separately allows all the relevant parties and trades to do what they need to with the model, perform take offs and find out the true properties of the object, and is almost a requirement for the production of a Level 400 or Level 500 model.

Sure, it may take a little more time initially, but it is a 'best practice' and will save you time down the road.


Monday, October 24, 2011

2D vs 3D on levels and grids

You may have noticed a '2D' or '3D' symbol next to the grips on levels and grids when you go to move them, but do you know what these actually mean?


Levels and grids, like virtually everything else in the model are parametric elements and will appear in any view cut 90 degrees to the plane they define (confused? Look for another post in the future on this). Sometimes depending on the crop properties of the view you may want to define the position of these elements independently from where they are shown by default when you create the view.

When the '3D' symbol shows, that means the position of the grid bubble (or level, or section, etc) will be adjusted in all similar views to match where you place it. If you want to define the position of the bubble in only your current view, then click on the symbol and it will change to '2D' which means you can adjust it independently in your view and not affect its position in any other view. This will probably be most noticeable in elevations when defining the position of structural grids and levels.

If you move the bubble, and look at a different view and it moved and you ask yourself "What the...", then check the '2D' or '3D' property of that grid.


Thursday, October 20, 2011

AUGI October Issue Published

The AUGI October issue has been published. There are two articles this month that may be of interest to some people.


pp. 23-25 Has an article pertaining to how to stack electrical symbols in plan with Revit MEP (when several outlets or services are close together on the wall)
pp. 34-39 Talks about how to 'customize' Revit for your use. Mainly it deals with office standards and making sure you aren't re-inventing the wheel every time you do a project with the use of templates and customizing families, but some are interesting tips for your own use. It is good information however.

Long Range Lakefront Plan

You may have heard about it in the news, well a video has been released showing what the Long Range Lakefront Planning Committee, Michael Cudahy and EUA has come up with for an option to redevelop the lakefront.
http://www.jsonline.com/general/37714089.html?bcpid=8725036001&bckey=AQ~~,AAAAAGgk8Us~,dLqgruaIT6rTqyyEHVUdSjL5KQ9h61sv&bclid=0&bctid=1226496783001

Tuesday, October 18, 2011

What is LOD?

LOD refers to 'Level of Detail' and is used to define the level of detail of a revit model. There is a common definition which was defined by the AIA in E202 which is used around the profession. It consists of five levels, labeled 100 to 500. Here it is in a nutshell.


     LOD 100 - Massing model
     LOD 200 - Model with generic model elements, may not have properties associated with them
     LOD 300 - A model built with specific assemblies to the model elements and confirmed 3D object geometry
     LOD 400 - Acceptable for shop drawing and fabrication
     LOD 500 - As built, actual field condition model.

As Architects, we will mostly be building Level 300 and Level 400 models depending on the clients/contractor's needs. There is significantly more work involved in creating a Level 400 model as you must ensure all systems are coordinated against each other and the modeled geometries are accurate in all three dimensions and assemblies (wall) are accurate in dimensions and composition, however the power of Revit makes this task not as daunting as it may seem. Many argue this is the way to do it by default from the beginning of your project, as it is much easier to do it right away then have to go back and change everything later. Some also say if you are doing Revit this is the right way to do it and any other way is just lazy.

If the contractor wishes to use the model in any capacity (whether as a contract document or not) then a Level 400 model is required. To build a level 400 model you must also have knowledge of custom parametric family creation as you will undoubtedly run into the need to create a custom family for what you wish to model as one may not exist yet. This is leveraging the power of the "I" in BIM, one of the strongest capabilities of the software.

To see more detail on LOD and what is involved for each level here is a helpful links:
http://www.ipd-ca.net/Model%20Progression%20Spec%20V%2008-08-20.xls

Thursday, October 13, 2011

Lightening things up a little bit...


I thought we might lighten things up a little bit and have a laugh on this Thursday.

Too bad the commercial isn't playing in the US.  (no sound is required)

Tuesday, October 11, 2011

New Blog Features!

As the blog is growing in popularity and content (It's had over 300 views since it was launched 6 weeks ago, and averages 10 views a day) we have had to come up with new ways to manage all the content being posted and stored so we've rolled out some new features to keep you coming back and to help you find something you saw in the past.


Labels:
We have added labels to the previous posts. 'Labels' are one word phrases to help categorize the content of the post. If you're looking for a post about families or dimensioning, all you have to do is click on that label and you will be shown all posts that deal with that topic. Labels can be found on the right hand side of the page below the archive tree.

Polls: In an effort to make things a little more fun, we have introduced poll's onto the page. Each week (or every couple) we will be posting a poll to collect your thoughts on a certain subject. Our inaugural poll was in relation to the post about cloud or Revit rendering. 6 people voted on the poll. Check out this feature and vote the next time you see a topic posted!

Email: Want to reach us? Have a comment about a post? Have an idea about a new post you would like to see? We need help! We have had a few guest authors, but want more. If you want to post to the blog, or comment on a post you read, email us at citylightrevitusers@gmail.com

Monday, October 10, 2011

Naming Reference Planes

Creating your own reference planes in families? Unless you name them, your options on what to do with them are limited. But give them a name and suddenly the possibilities open wide (like defining them as host's).

As you create more complex families, and wish to create them parametrically (like different types that can flex based on formulas, parameters and constraints you set up) how you name your reference planes can start to be a big deal.
For anyone who has written formulas in Revit to define an object's behavior knows how tedious, difficult and touchy can be. Start adding spaces to parameters in your equation, and the probability of an error increases dramatically.

If you adopt a naming practice that you employ throughout the program, you can cut down on these errors dramatically and it is recommended that you remove all spaces from custom parameters. This means even if the parameter consists of several words, that the variable used to define it is only one word. To prevent confusion and so you can still spell it, capitalize the first letter of each word.
For example:
'Top Plane' should be 'TopPlane'
'Door Handle' should be 'DoorHandle'
'Super Complex Ridiculous Family' should be 'SuperComplexRidiculousFamily'

See the trend here? Maybe it will take some getting used to start naming things this way, but if you adopt this practice you can eliminate some of your future headaches as your skills progress and you start creating more complex and parametric families.

Thursday, October 6, 2011

Revit vs. Cloud... Can't touch this!

Here is a real life example of Revit Rendering vs. the Cloud.

Top image: Revit, Render time 3 hours 30 min on an 8-core 16GB RAM Windows XP x64 machine
Bottom Image: Cloud, Render time 12.8min

Which one do you like better? Take the poll to the right and tell us!

Revit Render, 3.5 hours
Cloud Render: 12.8 min

Wednesday, October 5, 2011

A Theory on Worksets

There are many theories out there on worksets and how to use them when you have a central file and linked files.


One popular method is to place any linked file on its own workset. This makes turning it on or off much easier in each view. It also allows you to lock it (by checking out the workset) so that no one else can move the model by mistake.

When you get into theories on setting up worksets in your central file to be shared with other users, you will find several trains of thought. There is no right way and just like anything else each have their own benefits and drawbacks. In the end, it only matters how much control you wish to have over a set of particular elements in the model, or how many people you have working in the model at a time (if there are more worksets, you could theoretically have more people working...)

One method is to have a separate workset for different categories of elements in your model. For example: Exterior walls, interior walls, doors & windows, floor pattern plans, ceilings, & furnishings. Another method is to have a smaller number of worksets, but more elements on each. For example: Exterior, Interior, Floor patterns. You could further divide each category by including a pre-fix for what area of the building it is in (for example, west, south, east, etc. to correspond with how you have the floor plan divided to go onto a CD's sheet) as well as the level, so you would have a '4th floor exterior walls' workset. As you can see though, this can make you end up with a lot of worksets in your model, which may not be a good thing.

As you can see, a common entity between the two is to locate your floor patterns and/or wall patterns on a single workset. This will allow you to much more easily turn them off in almost every other view. Where you don't want them, and will beat going at the lines one by one in each view, or having to create a sub-category, or whatever method you may prefer.

This post only covers a couple thoughts on workset creation, although the ones mentioned here are some of the more popular ones in the community. If you have some of your own thoughts on the subject, we invite you to share them.

Monday, October 3, 2011

Quick Way to Enter Dimensions

Tired of entering the feet and inches sign whenever you type in dimensions? There is no longer a need to do that. As with everything else in Revit, there is (at least) 3 ways to do it.


Instead of typing 5'3" you can get away with typing 5-3 or 5 3. I find the former easier as I can place my hand on the number pad and quickly type the value for feet, the dash symbol (upper right corner) and the value for inches. It take away the need to use two hands to complete the task and is much easier than pausing to type the ' and " symbols. I have also seen people type in dimensions using the space bar, which is also just as quick.

Still typing dimensions with the feet and inches symbols? Try one of these new ways and see if you increase the efficiency of your workflow!